Techno Barje

Catch All Requests to a Specific Mime Type/file Extension in Firefox

Here is a Mozilla Javascript Module which allow to catch absolutely all requests based on their Content-Type Http header (ie Mime type) or their filename.

contentTypeObserver.js
(under LGPL License)

Normally, it would be simple to catch all firefox request by adding a nsIURIContentListener like this :

Components.classes["@mozilla.org/uriloader;1"].getService(Components.interfaces.nsIURILoader).registerContentListener( ...nsIURIContentListener... );

But for some reason, this listener is bypassed here when the HTTP request contains a Content-Disposition header :(
So I give you there all Mozilla black magic needed to catch really all requests.

Hello world

Components.utils.import("resource://your-extension/contentTypeObserver.js"); 
var contentTypeObserver = {};

// Tell if we must catch requests with this content-type
// requestInfo is an object with 3 attributes : contentType, contentLength and fileName.
contentTypeObserver.getRequestListener = function (requestInfo) {
  // Return a new instance of nsIWebProgressListener
  // (a new instance to avoid conflicts with multiple simultaneous downloads)
  return {
    onStartRequest : function (request, context) {

    },
    onStopRequest : function (request, context, statusCode) {

    },
    onDataAvailable : function (request, context, inputStream, offset, count) {

    }
  };
  // There is an helper function that allow to automatically save this request to a file,
  // you just have to pass destinationFile argument which hold a nsIFile instance :
  return createSaveToFileRequestListener(requestInfo, destinationFile, function () { dump("file : "+destinationFile.spec+" downloaded!
"); }
}

addContentTypeObserver(contentTypeObserver);

FoobarFox : JSCtypes Putting Foobar Into Your Firefox!

FoobarFox

FoobarFox features

  • Retrieve currently playing song information into your Firefox
  • Automatically post to your twitter account all listening tracks
  • Search for information on wikipedia, myspace or google

FoobarFox prerequisites

install foofox@techno-barje.fr.xpi

foobarfox foobarfox


Real world JSCtypes usage

FoobarFox is not so usefull, it’s mainly a proof of concept for JSCtypes capabilities.
Let’s see how use JSCtypes to do fun things. You can copy paste this sample code into your JS Console while your foobar is playing something :

Components.utils.import("resource://gre/modules/ctypes.jsm");

/* Change the dll path if your main windows directory is not on C:\WINDOWS! */
var lib = ctypes.open("C:\\WINDOWS\\system32\\user32.dll");

/* Declare the signature of FindWindows function */
var findWindowEx = lib.declare("FindWindowW",
                               ctypes.stdcall_abi,
                               ctypes.int32_t,
                               ctypes.ustring,
                               ctypes.int32_t);

/* Search for Foobar windows by it's id */
/* this ID is often changing of value at each release :/ */
var win = findWindowEx("{DA7CD0DE-1602-45e6-89A1-C2CA151E008E}/1", 0);
if (!win)
  win = findWindowEx("{DA7CD0DE-1602-45e6-89A1-C2CA151E008E}", 0);
if (!win)
  win = findWindowEx("{97E27FAA-C0B3-4b8e-A693-ED7881E99FC1}", 0); 
if (!win)
  win = findWindowEx("{E7076D1C-A7BF-4f39-B771-BCBE88F2A2A8}", 0);

/* Define another signature of windows API function */
var getWindowText = lib.declare("GetWindowTextW",
                               ctypes.stdcall_abi,
                               ctypes.int32_t,
                               ctypes.int32_t,
                               ctypes.ustring,
                               ctypes.int32_t);

/* Fill the string buffer we give to JSCtypes call */
var text="";
var max_len = 100;
for(var i=0; i < max_len; i++)
  text+=" ";
var text_len = getWindowText(win,text,100);

/* Extract song information from foobar window title */
var m = text.match(/(.*) - (?:\[([^#]+)([^\]]+)\] |)(.*) \[foobar2000.*\]/);

var musicinfo = {
  artist : m[1],
  album : m[2],
  trackNumber : m[3],
  track : m[4]
};
alert(musicinfo.toSource());

JSCtypes current capabilities

As I said in my previous post, ctypes support in Firefox is limited and we can’t use struct. So we’re able to play only with libraries that wait string and int. You can even pass objects/structures, but only if they can be created by a function whose arguments support the same limitation. As you can see in the previous example, we’re able to retrieve a pointer to a HWND object with FindWindowEx because it only wait string arguments. After that we give this pointer to getWindowText as a ctypes.int32_t.

JSCtypes current limitations

Now, let’s see a C++ code that can’t be mapped into JSCtypes :

// Add a notification to the tray.
NOTIFYICONDATA nid = {0};

nid.cbSize         = sizeof(nid);
nid.uID            = 100;    
nid.uFlags         = NIF_ICON;
nid.hIcon          = LoadIcon(g_hInstance, MAKEINTRESOURCE(IDI_SAMPLEICON));

Shell_NotifyIcon(NIM_ADD, &nid);

source: msdn

In this case, we are neither able to create any NOTIFYICONDATA object, nor to set attributes on this structure.


For more information

  • JSCtypes api. But take care, this is a work in progress!
  • Bug 513788 - Revise js-facing API for js-ctypes.
  • Bug 429551 - add struct support to js-ctypes.

JS Ctypes

Bug 518721 - Implement jsctypes with raw JSAPI
Status: SOLVED FIXED!!!

That’s an awesome news for mozilla’s developpers!
JS Ctypes aims to provide the same library than Python Ctypes :

You can load any dynamic library (dll, so, dylib) and call C-functions directly from your Javascript. In the current implementation only simple types are supported : numbers, string, boolean. For now, we can’t play with pointers, nor structures, but these features are planned.


simpler code -> less work -> simpler review

This new feature is going to greatly ease platform specific developpement like windows management, system calls, … For example we’re able to call Windows API directly from Javascript, without having to create, compile and maintain any C++ XPCOM!
One side effect is that it will ease code review for https://addons.mozilla.org/ too! Instead of shipping an obscure dynamic library with our extension, we may build only a JS-Ctypes wrapper and call directly OS libraries or call a common library that can be validated by reviewers with some MD5 checks.


simpler code -> less knownledge -> better learning curve

This is going to simplify the use of native code too! You can now build native code without having to learn any mozilla "things" (XPCOM, specific build layout/system, …) You will just have to expose your library with a C api and write a simple JS-CTypes wrapper.


Hello World!

  • First retrieve Firefox 3.6b1pre nightly or Firefox 3.7a1pre nightly
  • On windows, copy and paste this code in your JS console.
    This will display an OS native dialog.
    (Change the dll path if your main windows directory is not on C:\WINDOWS!)
    /* Load JS Ctypes Javascript module */
    Components.utils.import("resource://gre/modules/ctypes.jsm");
    var Types = ctypes.types;
    
    /* Load windows api dll */
    var lib = ctypes.open("C:\\WINDOWS\\system32\\user32.dll");
    
    /* Declare the signature of the function we are going to call */
    var msgBox = lib.declare("MessageBoxW",
                             ctypes.stdcall_abi,
                             ctypes.int32_t,
                             ctypes.int32_t,
                             ctypes.ustring,
                             ctypes.ustring,
                             ctypes.int32_t);
    var MB_OK = 3;
    
    /* Do it! */
    var ret = msgBox(0, "Hello world", "title", MB_OK);
    
    /* Display the returned value */
    alert("MessageBox result : "+ret);
    
    lib.close();
    

How to Setup a Mozilla Extension Update Server

I’ve shared in the previous post a command line version of Mccoy. Here is a new tutorial on how to use it!

Prerequisite

  • a HTTP server
  • Patched version of mccoy, with command line capabilities : mccoy.tar.gz
  • This start kit : mccoy-test.tar.gz which bundle a sample extension and one update.xml file
$ cd /one/of/your/htdocs/dir
$ wget http://blog.techno-barje.fr/public/mccoy.tar.gz
$ tar zxvf mccoy.tar.gz
$ wget http://blog.techno-barje.fr/public/mccoy-test.tar.gz
$ tar zxvf mccoy-test.tar.gz
$ cd mccoy-test/
$ ls
update.xml  workdir  xpis


Setup your XPI with valid update information

Create a new key in Mccoy

mccoy-test $ cd workdir/
workdir $ ls
chrome  chrome.manifest  install.rdf
workdir $ ../../mccoy -createKey myextensionkey
Creating key with name : myextensionkey
Public key : MIGfMA0GCSqGSIb3DQEBAQUAA4GNADCBiQKBgQDbV+ZGXs658dOm/+4YtT+VzT5JWzMFYiQ8155fnMkOJCina2yDEBq8Lvi5qF5SyoMDkqaYeO51LR+B4p1g7oWmBW9HbOz3eA9lD/AHUR1SHiJAX7RQq8v9sPSkYta+LyVrCMFgpTmhOWPUXOnwalmL7syGkXyjxHqHCYz+s3d22QIDAQAB
The key has been successfully created!

Remember the name of your key (if you forgot the name, you can later execute mccoy -listKeys)
Inject the public key in your extension

workdir $ ./mccoy -installKey install.rdf -key myextensionkey
Public key inserted!

This will set the updateKey attribute with the public key. (you can later retrieve the public key with mccoy -publicKey myextension)
Set the updateURL attribute of the install.rdf with the URL of the update.xml file located in mccoy-test/update.xml

workdir $ vi update.rdf

Build the first xpi

$ zip -r ../xpis/mccoy-test-0.1.xpi .

»» now install this XPI! This sample extension will just display an alert with message "Mccoy 0.1!"


Create a new version of your extension

Alter the sample extension alert message with something new

workdir $ vi chrome/content/firefoxOverlay.xul

Update the version number with 0.2

workdir $ vi install.rdf

Build the new xpi

workdir $ zip -r ../xpis/mccoy-test-0.2.xpi .

Update the update xml file

workdir $ cd ..
mccoy-test $ vi update.xml
### change version with 0.2
### change updatelink with mccoy-test-0.2.xpi
### change updatehash with result of sha1sum xpis/mccoy-test-0.2.xpi

Sign the update file with mccoy

mccoy-test $ ../mccoy/mccoy -signRDF update.xml -key myextensionkey
Sign < update.xml > with key < myextensionkey >
Sign addon : urn:mozilla:extension:mccoy-test@techno-barje.fr
File signed!

This will set the signature attribute with computed with your private key.


»» You can now force the update in your firefox, relaunch it and voilà!


Some tips for debugging

Enable this two about:config entries in order to get some message in JS console about update process :

extensions.logging.enabled = true
javascript.options.showInConsole = true

Mozilla Mccoy Tool From the Command Line

We have seen in the previous post how to build an headless xulrunner application.
My first use case was enabling the Mozilla Mccoy application to launch from command line. That allows me to build a bash script which create nightly builds of a firefox extension automatically updated by Firefox every day!.


Here is the resulting Mccoy version :


Now, a summary of each command line arguments :

# Create a new named public/private key
$ ./mccoy -createKey mykey
Creating key with name : mykey
Public key : MIGfMA0GCSqGSIb3DQEBAQUAA4GNADCBiQKBgQDbV+ZGXs658dOm/+4YtT+VzT5JWzMFYiQ8155fnMkOJCina2yDEBq8Lvi5qF5SyoMDkqaYeO51LR+B4p1g7oWmBW9HbOz3eA9lD/AHUR1SHiJAX7RQq8v9sPSkYta+LyVrCMFgpTmhOWPUXOnwalmL7syGkXyjxHqHCYz+s3d22QIDAQAB
The key has been successfully created!

# List all keys in the current mccoy profile
# /!\ Don't forget to save your profile!
$ ./mccoy -listKeys
Registered keys :
 - mykey

# Inject the public key in your extension's install.rdf
$ ./mccoy -installRDF myextension_workdir/install.rdf -key myextensionkey
Public key inserted!

# Update the signature of the update xml file
$ ./mccoy -signRDF update.xml -key mykey
Sign < update.xml > with key < mykey >
Sign addon : urn:mozilla:extension:mccoy@techno-barje.fr
File signed!

# Check if the update xml file is correctly signed
$ ./mccoy -verifyRDF update.xml -key myextensionkey
Check rdf : update.xml with key myextensionkey
Valid signature!

Headless Xulrunner

Here is a summary on how to run a xulrunner application on an headless computer, or more commonly just launch xulrunner in a command line with no windows.


By default, xulrunner try to open a XUL window defined in the ""toolkit.defaultChromeURI"" preference, so you have to set this one to an empty value.


Then you need to have a running X server, even if it never open any window … one simple and lightweight solution is running Xvfb. But any other X server will do the work!


Finally, I suggest you to take the 1.9.0.14 xulrunner release which has less painfull dependencies like libalsa (due to ogg support) and libdbus-glib.


This will avoid this kind of errors :

./xulrunner-bin: error while loading shared libraries: libasound.so.2: cannot open shared object file: No such file or directory
./xulrunner-bin: error while loading shared libraries: libdbus-glib-1.so.2: cannot open shared object file: No such file or directory

How to write such a tutorial without a complete working out of the box hello world ?
Here is a sample command line application with linux xulrunner binaries : headless-runner.tar.gz

$ tar zxvf headless-runner.tar.gz
$ cd headless-runner
$ Xvfb :2
$ export DISPLAY=:2
$ ./headless -ls -filesize application.ini
LS :
 - application.ini
 - a.out
 - tests
 - components
 - defaults
 - updates
 - extensions
 - xulrunner-1.9.2a2pre.en-US.linux-x86_64.tar.bz2
 - xulrunner
 - headless

$ ./headless -filesize application.ini
File size of : application.ini
  243

The main code is in the file components/nsCommandLineHandler.js

CommandLineHandler.prototype.handle = function(aCmdLine){
  
  var toggle = aCmdLine.handleFlag("ls", false);
  if (toggle) {
    dump("LS : 
");
    var list = aCmdLine.workingDirectory.directoryEntries;
    while(list.hasMoreElements()) {
      var file = list.getNext().QueryInterface(Components.interfaces.nsIFile);
      dump(" - "+file.leafName+"
");
    }
    dump("
");
  }

  var filesize = aCmdLine.handleFlagWithParam("filesize", false);
  if (filesize) {
    dump("File size of : "+filesize+"
");
    var file = aCmdLine.resolveFile(filesize);
    if (!file)
      return dump("Unable to find this file
");
    dump("  "+file.fileSize+"
");
  }
}

For more information, check the nsICommandLine interface of the aCmdLine object.


Last but not least, why do I try to use Xulrunner in command line whereas xpcshell and "js" commands exists?!

  • First: Some tools like Mccoy are bundled as xulrunner application. And you may launch these tools on headless servers in order to build, for example, continuous integration tools!
  • Second: JS shell allow you tu use only pure Javascript; Xpcshell expose all XPCOM but some part of Mozilla environnement are disabled! I was unabled to create a <canvas> element in xpcshell. There is no way to create a XUL/HTML document/element with XPCOM and hiddenWindow is disabled … So the only solution to build a tool which takes website screenshots with <canvas> was using xulrunner!

XUL Profiler

addon_thumb.png XUL Profiler ? Qu’est-ce donc ? Et bien c’est l’extension Firefox que j’ai pu développer chez Yoono. Elle a pour but de donner des pistes aux développeurs XUL (mais aussi aux développeurs Web) pour optimiser les performances de leurs applications.

Pour l’instant, cette extension permet de récolter deux informations :

  • un callgraph Javascript : Chaque appel de fonction est consigné dans un arbre et classé par son temps d’exécution. On peut ainsi rapidement repérer les fonctions qui ralentissent le navigateur.
  • une vidéo des rafraichissements de Firefox : Toutes les opérations de mise à jour graphique de firefox sont enregistrées dans une vidéo qui nous permet d’apprendre à optimiser notre Javascript ainsi que les CSS afin de soulager Firefox dans son travail de layout.

L’extension est disponible sur Mozilla addons

Voici quelques résultats sur des exemples simples.

Callgraph Javascript

(Fichier html de test)

function fun_root() {
  fun_A();
  fun_B();
  fun_C();
}
function fun_A() {
  dump("fun A");
}
function fun_B() {
  dump("fun B");
  var s="";
  fun_D();
  for(var i=0; i<1000; i++) {
    s+="CPU INTENSIVE FUNCTION";
    fun_D();
  }
  fun_D();
}
function fun_C() {
  dump("fun C");
}
function fun_D() {
  dump("fun D");
}

test-xulprofiler-callgraph.png

On voit ici la hiérarchie des appels entre les fonction grâce à la présentation sous forme d’arbre, et l’on peut conclure que la majorité du temps de calcul de ce script est effectué dans la fonction "fun_B".

Paint events

(Fichier html de test)

function delayEachInserts() {
  for(var i=0;i<20;i++) {
    window.setTimeout(insertItem,100*i,i);
  }
}
function insertItem(i) {
  var container=document.getElementById("container");
  var item=document.createElement("div");
  item.setAttribute("class","item");
  item.textContent="Item "+i;
  container.appendChild(item);
}
window.addEventListener("load",delayEachInserts,false);

  => Résutat

Cet exemple montre que lorsqu’on ajoute un élement DOM, Firefox est obligé de rafraichir son conteneur à chaque ajout.

Ocaml Native Code Debugging

t-caml-valid-callgraph.png 
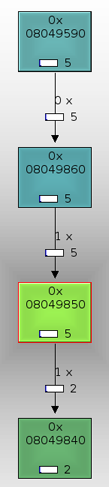
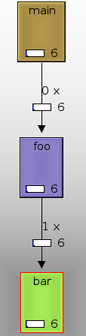
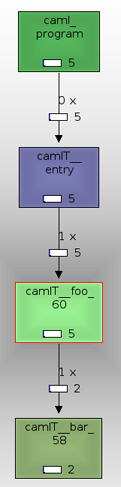
Maintenant que le bug Improve gnu ELF est corrigé, kcachegrind nous génère de beaux callgraphs.

Ce patch consistait à ajouter des instructions .size (dans l’assembleur ELF) pour que valgrind interprète tous les symboles (camT_entry, camlT_foo, camlT_bar, …) et puisse ainsi afficher leurs noms au lieu d’un nombre hexadécimal!

Les standards ELF pour le debug

Maintenant, nous souhaiterions que ces outils puissent savoir de manière standard dans quels fichiers et à quelles lignes sont déclarés les fonctions. (Le nom du fichier est bien présent dans les symboles, mais cela ne permet pas d’exploiter le plein potentiel de ces outils)

Voyons un peu comment se débrouille GCC :

  int bar(int a) {
        return 1+a;
  }
  
  int foo(int a) {
        return 2+bar(a);
  }
  
  int main() {
        foo(3);
  }
  $ gcc -O0 -g -S t.c
  .globl bar
        .type   bar, @function
  bar:
  .LFB2:
        .file 1 "t.c"
        .loc 1 1 0
        pushq   %rbp
  .LCFI0:
        movq    %rsp, %rbp
  .LCFI1:
        movl    %edi, -4(%rbp)
        .loc 1 2 0
        movl    -4(%rbp), %eax
        incl    %eax
        .loc 1 3 0
        leave
        ret
  .LFE2:
        .size   bar, .-bar
  .globl foo
        .type   foo, @function

Les instructions clés sont .file et .loc :

  • .file déclare un chemin vers un fichier et l’associe à un identifiant

-> .file $identifiant$ "$chemin_du_fichier"

  • .loc associe un fichier, un numéro de ligne et de colonne aux instructions la succédant

-> .loc $identifiant_de_fichier$ $ligne$ $colonne$

Solution proposée

Le module du compilateur qui génère les instructions est : asmcomp/i386/emit.mlp
Et plus particulièrement la fonction fundecl :

  let fundecl fundecl =
    function_name := fundecl.fun_name;
    fastcode_flag := fundecl.fun_fast;
    (* ... *)
    `   .globl  {emit_symbol fundecl.fun_name}
`;
    `{emit_symbol fundecl.fun_name}:
`;
    if !Clflags.gprofile then emit_profile();
    let n = frame_size() - 4 in
    if n > 0 then
      ` subl    ${emit_int n}, %esp
`;
    `{emit_label !tailrec_entry_point}:
`;
    emit_all true fundecl.fun_body;
    List.iter emit_call_gc !call_gc_sites;
    emit_call_bound_errors ();
    List.iter emit_float_constant !float_constants;
    match Config.system with
      "linux_elf" | "bsd_elf" | "gnu" ->
        `       .type   {emit_symbol fundecl.fun_name},@function
`;
        `       .size   {emit_symbol fundecl.fun_name},.-{emit_symbol fundecl.fun_name}
`
    | _ -> ()

Hors nous n’avons à disposition que la variable fundecl :

  type fundecl = 
  { fun_name: string;
    fun_body: instruction;
    fun_fast: bool } 
  type instruction =
  { mutable desc: instruction_desc;
    mutable next: instruction;
    arg: Reg.t array;
    res: Reg.t array;
    dbg: Debuginfo.t;
    live: Reg.Set.t }

Il y a bien un attribut dbg sur les instructions mais il est rarement renseigné. (une compilation avec l’option -dlinear permet de le voir)

J’ai décidé d’ajouter un attribut fun_dbg : Debuginfo.t sur fundecl et de le remplir dans toutes les phases de compilation. Il serait peut être plus judicieux de travailler sur l’attribut dbg des instructions ? (car cela permettrait par la suite d’indiquer les lignes de chaque instruction à valgrind, mais aussi gdb!) Ce patch n’est pas optimisé car il répète l’instruction .file pour chaque .loc, donc à chaque entête de fonction, nous avons un .file et un .loc.

-> Patch sur la branche release311

Voyons maintenant ce qu’apporte ce patch.

Résultats avec gdb

  $ ocamlopt -g -inline 0 t.ml
  $ gdb a.out
  (gdb) break t.ml:6
  Breakpoint 1 at 0x8049940: file t.ml, line 6.
  (gdb) run
  Starting program: /home/alex/callgraph/a.out 
  
  Breakpoint 1, camlT__foo_60 () at t.ml:6
  6       let foo i  =
  Current language:  auto; currently asm

  (gdb) backtrace
  #0  camlT__foo_60 () at t.ml:7
  #1  0x0804c570 in camlT__entry () at t.ml:12
  #2  0x0806e4b7 in caml_start_program ()
  
  (gdb) step 1
  camlT__bar_58 () at t.ml:2
  2       let bar i =
  
  (gdb) list
  1
  2       let bar i =
  3               1+i
  4       ;;
  5
  6       let foo i  =
  7               2+(bar i )
  8       ;;
  9
  10      let () =

Résultats avec gprof

  $ ocamlopt -g -p -inline 0 t.ml
  $ ./a.out
  $ gprof -A
  *** File /home/alex/callgraph/t.ml:
                  
           1 -> let bar i =
                        Thread.delay 3.0;
                        1+i
                ;;
                
           1 -> let foo i  =
                        2+(bar i )
                ;;
                
                let () =
           1 ->         let closure() = 3 in
                        print_int ( foo (closure()) )
                ;;
                
  Top 10 Lines:

     Line      Count
        2          1
        7          1
       12          1

  Execution Summary:

        3   Executable lines in this file
        3   Lines executed
   100.00   Percent of the file executed

        3   Total number of line executions
     1.00   Average executions per line

Résultats avec valgrind/kcachegrind

  $ ocamlopt -g -inline 0 t.ml
  $ valgrind --tool=callgrind ./a.out
  $ callgrind_annotate callgrind.out.2152 t.ml
  --------------------------------------------------------------------------------
  -- User-annotated source: t.ml
  --------------------------------------------------------------------------------
  .  
  8  let bar i =
  77,715  => thread.ml:camlThread__delay_75 (1x)
  .      Thread.delay 3.0;
  .      1+i
  .  ;;
  .  
  3  let foo i  = 
  77,723  => t.ml:camlT__bar_58 (1x)
  .      2+(bar i )
  .  ;;
  .  
  .  let () =
  13          let closure() = 3 in
  1,692  => pervasives.ml:camlPervasives__output_string_215 (1x)
  2,312  => pervasives.ml:camlPervasives__string_of_int_154 (1x)
  77,726  => t.ml:camlT__foo_60 (1x)
  .      print_int ( foo (closure()) )
  .  ;;
  .  
  $ kcachegrind callgrind.out.2152

kcachegrind-file-and-line.png


Et après ?

On peut espérer encore un tas d’améliorations, comme :

  • des breakpoints sur n’importe quelle ligne de caml …
  • un pluging gdb pour pouvoir lire des valeurs pendant un break!

Functional Programming and Finance

Qui l’eut cru ? Le petit Eddy, vous savez celui au fond de la classe qui adore les proba et supporte tout juste les délires de geek; et bien il est tombé lui aussi dans la spirale des langages modernes!

Il vient même de lancer tout seul un blog sur la promotion du F# dans la finance :
IT quant
Et oui, ils sont encore dans les solutions propriétaires en C … ++ !!!
Enfin, je le promets, je n’y suis pour pas grand chose pour son intérêt au F#

Ocaml Callgraph

KCacheGrind : un outil simple mais diablement efficace pour analyser les callgraph de programmes en C (ou python, php, perl, …) afin de faire du débogage ou encore de l’analyse de performance.

Situation actuelle avec un programme caml simple

Exemple utilisé :

let bar i =
        1+i
;;

let foo i  =
        2+(bar i )
;;

let () = 
        print_int ( foo 3 )
;;
  • D’abord nous compilons en désactivant les optimisations qui pourraient éliminer ces fonctions triviales
$ ocamlopt -inline 0 -o foo t.ml
  • Puis nous exécutons ce test via valgrind qui génère un fichier au format "callgrind", contenant l’ordre d’appel des fonctions ainsi que les estimations du temps passé dans chacune d’entre elles :
$ valgrind --tool=callgrind ./foo
  • Enfin, on regarde le résultat sous kcachegrind
$ kcachegrind callgrind.out.10624

t-caml-without-patch-callgr.png

Mais voilà, l’assembleur généré par le compilateur caml ne contient pas toutes les instructions utilisées par valgrind lors de l’analyse du programme. Ainsi, aucun label de fonction n’apparait et nous n’avons le droit qu’à des adresses mémoire en hexadécimal :(

/!\ Problème corrigé pour la version 3.11 : détails

Exemple du fonctionnement normal en C

Voyons comment valgrind fonctionne avec du C :

int bar(int a) {
        return 1+a;
}

int foo(int a) {
        return 2+bar(a);
}

int main() {
        foo(3);
}
$ gcc -O0 -o foo t.c
$ valgrind --tool=callgrind ./foo
$ kcachegrind callgrind.out.10719

t-c-callgraph.png

Cette fois-ci, nous obtenons un graphe correct avec le nom des fonctions; Regardons maintenant l’assembleur généré par gcc

 $gcc -O0 -S t.c

Assembleur de GCC :

        .file   "t.c"
        .text
.globl bar
        .type   bar, @function
bar:
        pushl   %ebp
        movl    %esp, %ebp
        movl    8(%ebp), %eax
        incl    %eax
        popl    %ebp
        ret
        .size   bar, .-bar
.globl foo
        .type   foo, @function
foo:
        pushl   %ebp
        movl    %esp, %ebp
        subl    $4, %esp
        movl    8(%ebp), %eax
        movl    %eax, (%esp)
        call    bar
        addl    $2, %eax
        leave
        ret
        .size   foo, .-foo

Comparons maintenant celui-ci à l’assembleur généré par le compilateur ocaml : Assembleur OCaml

        .text
        .align  16
     .globl     camlT__bar_58
        .type   camlT__bar_58,@function
camlT__bar_58:
.L100:
        addl    $2, %eax
        ret
        .text
        .align  16
     .globl     camlT__foo_60
        .type   camlT__foo_60,@function
camlT__foo_60:
.L101:
        call    camlT__bar_58
.L102:
        addl    $4, %eax
        ret

Dans les deux cas, nous retrouvons bien nos deux fonctions foo et bar avec les instructions : .globl, .type mais il manque .size à la fin des fonctions caml! Ceci est la source du problème pour valgrind, car après analyse de son code source, il ignore les fonctions de taille nulle …

Solution

Il suffit d’appliquer ce minuscule patch sur le compilateur ocaml pour générer des exécutables ELF valides aux yeux de valgrind : patch-alter_elf_for_valgrind-cvs-080620
(Patch réalisé sur la version CVS, qui correspond à la futur version 3.11)

Nous obtenons alors le callgraph suivant sur le premier exemple : t-caml-valid-callgraph.png

Exemple sur un vrai projet utilisant ocamlnet :

callgraph-with-patch2.png