Here is the very first release of Jetpack runner. This firefox extension built
on top of the Addon SDK is a personal project that aim to ease development of
firefox extension using the SDK. It is a great exhibit of SDK capabilities as
we can now develop such tool using the SDK itself! For now, to create an addon
you need to go thought a python application that only has a command line
interface:  This is painfull to install
and even more annoying to use on Windows as there is no really decent command
line interface. Finally, if we compare to chrome extensions, we only need
chrome to build an addon! This leads me to build a Firefox extension, that can
be really easy to install in Firefox and allow to build really cool interfaces
to create, run and test your addons.
This is painfull to install
and even more annoying to use on Windows as there is no really decent command
line interface. Finally, if we compare to chrome extensions, we only need
chrome to build an addon! This leads me to build a Firefox extension, that can
be really easy to install in Firefox and allow to build really cool interfaces
to create, run and test your addons.
Jetpack runner features:

- Download and install SDK automatically
- Create addon from templates
- Run an addon
- Execute unit-tests
- Generate firefox extension XPI file or xulrunner application package
- You can run these either in current firefox instance or run them in a new one
- We can execute a package as a firefox extension or as a xulrunner application
Jetpack runner first steps:
On extension installation, a tab opens automatically on "jetpack:" url, the
main jetpack runner interface. That allow to download and install a precise SDK
release:  Then it displays a list of packages provided
by addon SDK. "addon-sdk" is the main package to play with.
Then it displays a list of packages provided
by addon SDK. "addon-sdk" is the main package to play with.  After
clicking on "Create addon" button, you would easily create a new one by filling
obvious form and selecting a template addon:
After
clicking on "Create addon" button, you would easily create a new one by filling
obvious form and selecting a template addon:  And
then, you end up on your newly created addon package page, where you can run
it, execute unit tests or download as a firefox extension XPI file:
And
then, you end up on your newly created addon package page, where you can run
it, execute unit tests or download as a firefox extension XPI file: 
Jetpack runner!!!
Last but not least, here is a link to install it or to checkout the
source.
Firefox Extension:
jetpack-runner-0.1.1.xpi
Source code:
Github project
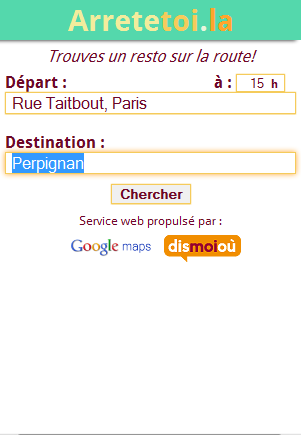
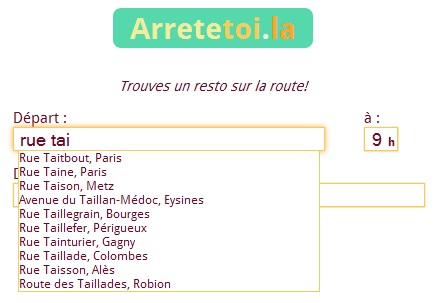 Votre trajet horodaté
 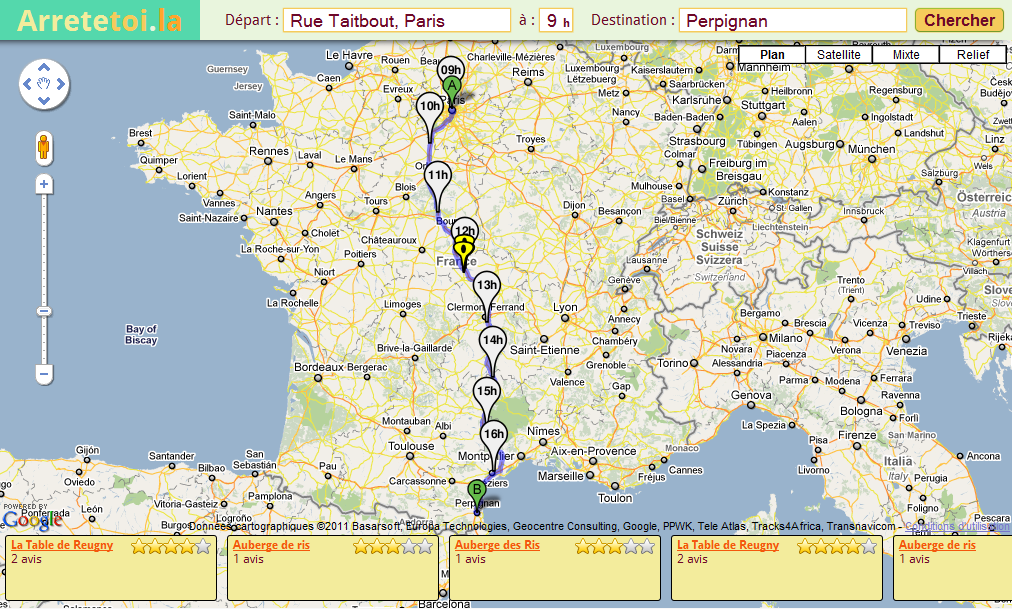 Lieu où vous serez à midi ou 20h, avec les restaurants recommandés
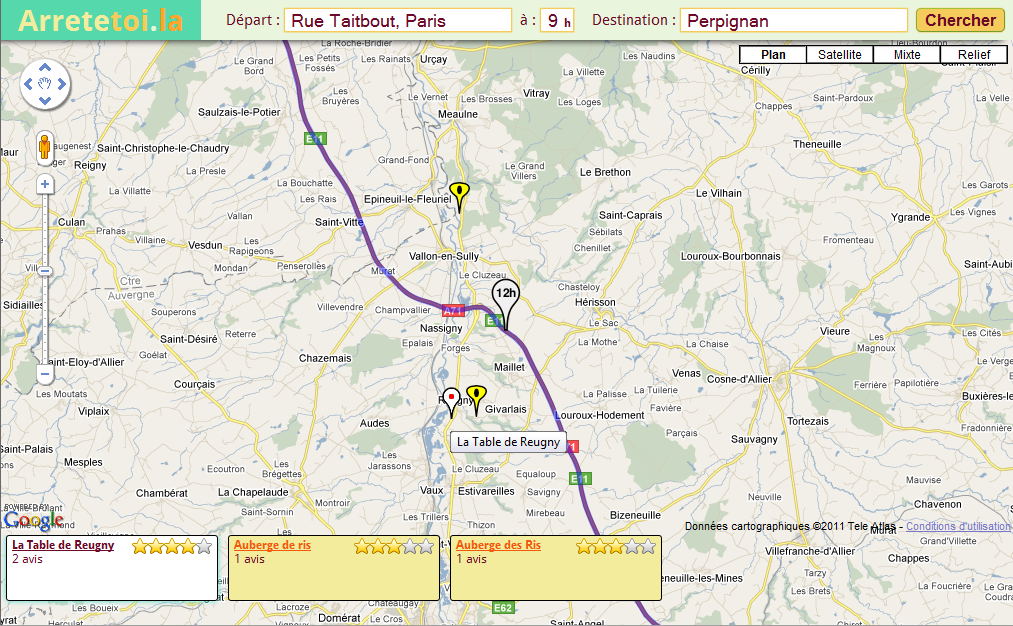
 Liste des restaurants recommandés autour de
midi ou 20h
Liste des restaurants recommandés autour de
midi ou 20h  Affichage du restaurant sélectionné sur une
carte avec votre trajet
Affichage du restaurant sélectionné sur une
carte avec votre trajet